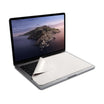
GhostCover Sticker Application
Using the included double-sided adhesive is optional. Sometimes you need to secure GhostCover to your keyboard so it does not lift during typing, or become displaced occasionally when you open the screen, or make it more resistant to the wind if you’re outdoor. Installing the double-sided adhesive stickers is quick and easy.
Note:
Applying adhesives may affect GhostCover’s washability. Only certain models come with stickers. If you need additional stickers, contact us for a free set.
Important:
Do not apply adhesives to the power button.
Step 1: Determine if you actually need it
Lay the GhostCover over the keyboard and type as you normally would. Take note if GhostCover lifts when you press certain keys. If there is no lifting during type, you may not need it.
Step 2: Apply adhesive to the GhostCover
Peel a piece of adhesive from the yellow paper backing, apply the adhesive to the underside of the GhostCover at or near the keys where lifting occurs.
Avoid placing adhesive on heavily typed keys
When you type on the keys with stickers applied, the adhesive can spread -- slowly losing its structural integrity and becoming gooey. Please see "Removing the adhesive stickers" section for easy removal method.Step 3: Putting the GhostCover back
Peel away white liner on each adhesive piece placed in step 2. Place the protector back on the keyboard and lightly press down on the keys with adhesives.
Removing the adhesive stickers
Lift the GhostCover away from the keyboard, the adhesives should come off from the keys.
If there’s residue after removing GhostCover from your keyboard, place a small piece of alcohol soaked tissue paper over the keys for about 5 minutes. You should be able to easily wipe away the residue afterwards.

